-Lightroom Application - Plugin Is Not ThereRead the article, or click the play button (right facing triangle) in the media player (directly below this text) to see the content in video form.
The video includes paths to locate the plugin on your computer. Please note that these paths are contained in the article below the media player, knowing this will save you from writing them down, or trying to remember them.
If the media player does not work for any reason, click here for a link to the video on YouTube.
If you are going to the Export feature but the ColorChecker Passport plug-in is not showing properly it is most likely due to it being disabled, the path pointing to the wrong location, or the folder is missing entirely therefore the software application cannot locate it. To resolve this we simply need to add the file in the correct location.
(On a Mac)
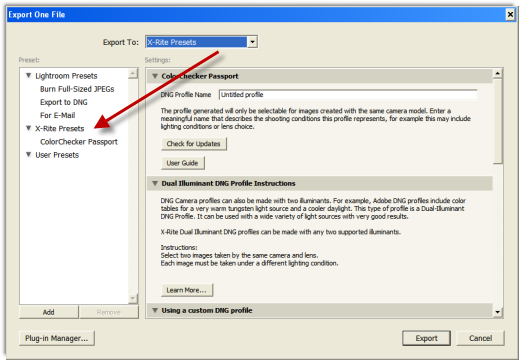
Launch Lightroom and select the Export option. Within this screen you should see the X-rite Presets > ColorChecker Passport as in this image:
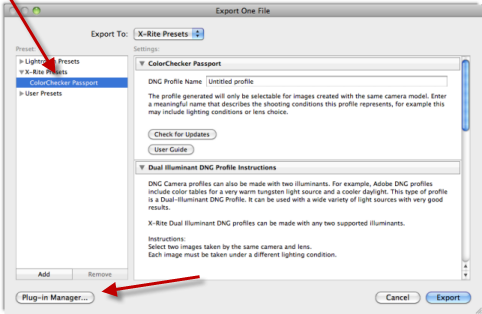
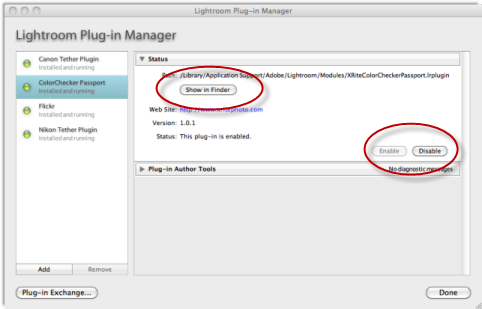
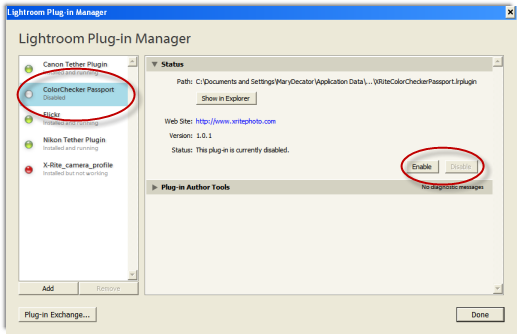
Next select Plug-in Manager. Look for the ColorChecker Passport within the Plug-in Manager options as below. If you see the plugin available here you will want to make sure that it is enabled. If it is disabled try to Enable it. If that is not working check that the path is correct. You will probably know if this doesn’t work right away as you may get a message showing that your plug-in is installed but not working properly or something of that nature. If that works for you then simply try to use the Plug-in and see if all is well. You might need to shut down Lightroom and then relaunch the program.
If this does not work we need to now verify that the path is correct and that the folder is not missing. In Mac OS X click on the "Show In Finder" option.
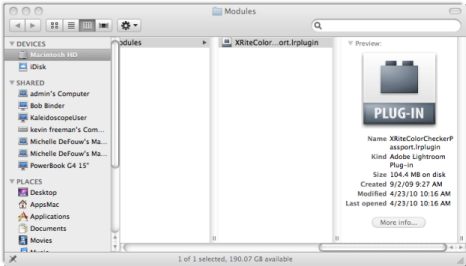
Once you select Show In Finder you should see that the path is correct and that the plug-in is actually where it needs to be. If that is not the case do a search of your system for XRiteColorCheckerPassport.lrplugin and move it to this location so it appears as:
Library > Application Support > Adobe > Lightroom> Modules > XRiteColorCheckerPassport.lrplugin.
If you are navigating to the User > Library location and you don't see a Modules folder please be sure to check the HardDrive location as well at this path:
Library > Application Support > Adobe > Lightroom> Modules > XRiteColorCheckerPassport.lrplugin
(On a PC)
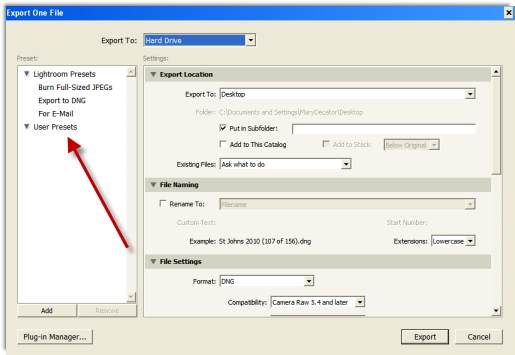
Launch Lightroom and click on the Export box as shown here:
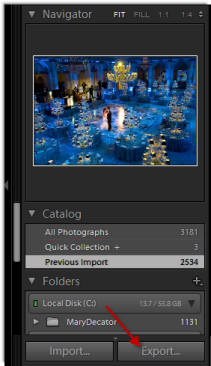
If everything is setup correctly you will see the Xrite-Preset opion in your left-hand pane. If the plugin is either disabled or the path is incorrect you will not see anything here. If this is the case simply click on Plug-in Manager:
If your plugin is showing as disabled you will simply need to click on "Enable". You will notice that the status has now changed from Disabled and the radio button is green showing Installed and running. If the status shows that it is "Installed: May Not work" this means that there is something that has become corrupted with the files path.
The simplest way to resolve this is to go to Add/Remove programs and then uninstall your ColorChecker Passport software. Now reinstall the software but make sure that you have Lightroom closed during this process and you are logged in as an adminstrator.
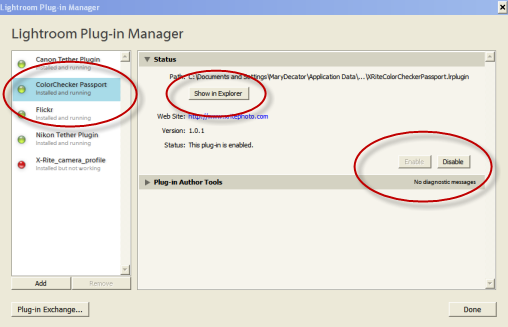
If this does not resolve the issue then navigate to the path by clicking the option "Show In Explorer". If that is not the case do a search of your system for XRiteColorCheckerPassport.lrplugin and move it to this location so it appears as:
XP: C:\Documents and Settings\UserName\Application Data\Adobe\Lightroom\Modules
Vista and Windows7: C:\Users\UserName\AppData\Roaming\Adobe\Lightroom\Modules
If you do not see the plugin listed at all in your Manager then you will need to add it manually by following these steps:
On a Mac:
1. Open an image in Lightroom and select “File” > “Export”
2. Click on “Plug-in Manager” in the lower left corner.
3. Click “Add” in the lower left corner.
4. Make sure that the “Macintosh HD” is selected in the drop down at the top of the window. and then navigate to Library/Application Support/Adobe/Lightroom/Modules.
5. Select “XRiteColorCheckerPassport.lrplugin” and then click on “Add Plug-in”
6. The Passport plug-in should now be listed as installed and running. Select “Done” in the lower right to complete the process. (You may need to close Lightroom and then re-launch before you can use it.)
On a PC:
Please try the following to load your Passport plug-in into Lightroom3:
1. Open an image in Lightroom and select “File” > “Export”
2. Click on “Plug-in Manager” in the lower left corner.
3. Click “Add” in the lower left corner.
4. Navigate to for XP users - C:\Documents and Settings\UserName\Application Data\Adobe\Lightroom\Modules For Vista and Windows7: C:\Users\UserName\AppData\Roaming\Adobe\Lightroom\Modules
5. Select “XRiteColorCheckerPassport.lrplugin” and then click on “Add Plug-in”
6. The Passport plug-in should now be listed as installed and running. Select “Done” in the lower right to complete the process. (You may need to close Lightroom and then re-launch before you can use it.)